So I finished my vacuum forming rig (less than $50 total for parts!). Since I didn't have any armor pieces ready to use as a mold, I used whatever was handy that had plenty of detail to test out. This happened to be my vise grips. On the first try, I ended up overheating the plastic (I used one of those cheap plastic "For Sale" signs), and it tore while getting vacuum formed.
 A few tries later with various objects, I fell back on the vise grips again and ended up with the following results by cutting one of those cheap, flimsy 3-ring binders. This shows some promise, but I still need to perfect the combination of which type of plastic, how thick, what temperature to heat it up to, and for how long. In the meantime, I'll work on sculpting the molds with Sculpey clay.
Monday, March 10, 2008
Day 15 - Vacuum Forming Part 2


Sunday, March 9, 2008
Day 14 - Vacuum Forming
So yeah, I came across this website with plans on how to make a very inexpensive (less than $50), but good vacuum former. I was aware that a lot of people make their storm trooper armor by vacuum forming, but I had no idea what the process was exactly or any of its other uses. I thought it involved a giant, expensive industrial machine (which it can be), but at its core, it's actually pretty simple: a flat surface with a hole (or holes) to vacuum air out, a mold, and frame-mounted plastic sheet. This video can probably best illustrate what I'm talking about, and it just so happens that this is the vacuum former I'll be making.
And why am I making one, you ask? Since the silver pieces of the nanosuit are so organically shaped (the "skeletal" parts if you will), it would be hard to make them any other way I can think of that would be both hard and flexible. And plus, it'd be so freakin' cool to have one. ;) I'm also thinking it would be a great way to make the base layer of the face mask so it would have a perfect fit by using a mold of the lower half of my face. Plus, the mold would be useful for any other future headgear I'd want to make.
I spent the day cleaning the apartment under orders from my wife ( :P ), so I only had time to buy the parts from Home Depot today before we went to my friend's birthday party.
Okay, so it's pretty late now, so I'll update you all later. Hopefully, I'll have time to build it and show you all pictures of the rig and maybe something I vacuum formed. If not, hopefully Monday.
Tuesday, March 4, 2008
Day 9 - New Armor Sample
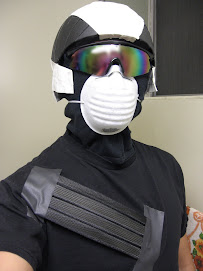
 It's been a while since my last post, but I've spent that time designing how to do the muscle armor, and I think I've found a good balance of color, thickness, texture, and comfort. I threw together this sample tonight to see what one of the chest pieces might look like. Looks pretty promising so far. I cut 1/4" thick strips of white EVA foam (craft foam) and stuffed them into the braided sleeving. Then I sealed them tight inside by using a craft hot knife (basically a soldering iron with special tips) to cut/melt the ends. I temporarily laid them out on a 3" wide strip of tape on the back, then put two strips on the front to secure it to my t-shirt. I originally intended on using black foam, but as chance had it, there was a foam and fabric store (mostly for furniture) that only had white. I went for it just so I could get a sample of 1/4" thick foam. That
  thickness was tough to find in the craft stores in my area. They only carried the 2mm thicknesses, not 6mm. Anyways, long story short, the white worked to my benefit, because it added a sense of depth and texture to the braiding. It was no longer black on black. If you looked at it straight on, you could see the white mixing with the black to produce a fairly accurate gray color from a distance. Up close you can see the white a little better (still looks good up close). And at an angle, the white foam gets completely hidden underneath, revealing a solid shiny black.
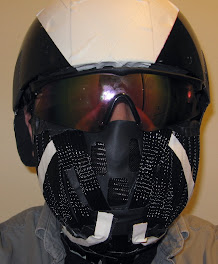
I think I'll use a similar effect for the helmet, except use 2mm thick sheets instead so it doesn't get too big. The helmet is already a little on the large side. Don't want Nomad to end up with a giant head. :)